
A while ago I made my son this cute little embroidered piece of loose-leaf paper (Yes I sewed LOTS of lines onto fabric) with a little "I love you." note on it. He was less than impressed with it. It didn't have wheels so... yeah, it got tossed around, every once in a while he would return it to me because he didn't want it, and so on. Just the other day he had my sweet little note rolled up. He brought it to me, looking extremely proud of himself, and enthusiastically explained that it was "A REAL treasure map!" I was happy that he finally found some use for it, but it surely was not a treasure map. My kid NEEDED a treasure map! Challenge accepted!

The fun this about this project is that It doesn't need to be exact, or really neat for that matter. The more hand made and rustic it looks, the better. If you want a basic guide to get you started, here's my pattern. 

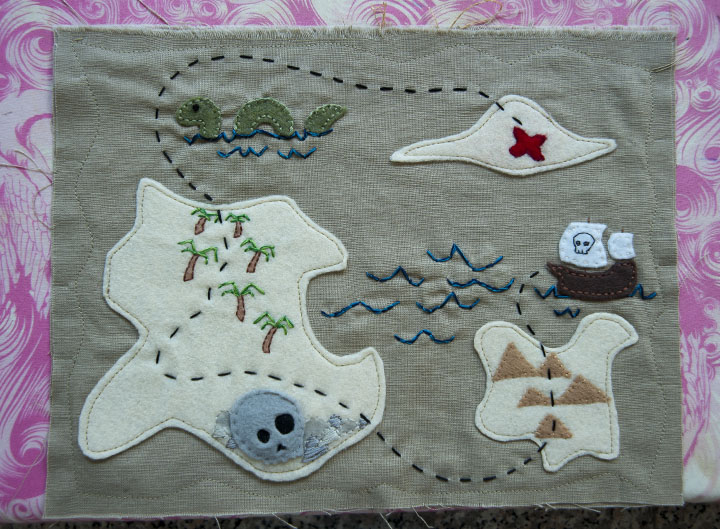
You can see that I deviated from my original plan a little bit.

•TWO pieces of fabric. I used canvas, measuring about 8.5x11. You can make whatever size you like though.
•Multiple colors of felt (this is a good felt scrap buster BTW)
•Coordinating embroidery floss and thread
•Fusible interfacing
•Iron
•Sewing machine

I like to use fusible interfacing when working with felt. It gives it a nice stability, and keeps it from stretching. So first, trace your pattern onto the interfacing(or cut out your desired shapes, if you're not using my pattern). This works well if you hold it up to a window, just make sure you're not tracing on the adhesive side.

Next, iron your pieces into their appropriate colors of felt.
NOTE: I use Eco Felt, it is plastic, and it does melt! Be very careful when affixing the interfacing!
•Use as low a heat setting as you can.
•Keep the iron moving.
•Steam seems to help things from getting sticky!
If it's the first time you're using this method, try it out on a scrap piece, so you can determine good setting for your iron.

Ok, now that we have everything ironed on, it's time to cut out. I try not to cut all the way up to the interfacing, leaving about 2mm of exposed felt around the edge looks nicer, especially on dark pieces.

Now to attach the decorative pieces, and embroider the details onto the islands. I used a soy crayon to fill on some of the color on the rocks and trees.

I was originally going to hand-sew this whole thing, and you can do that if you are more patient than I am, but I was getting antsy. So under the needle it goes! Pin down the islands where you want them to a single later of fabric (the second piece comes in later), and sew around the edges. Don't worry if everything isn't even, you can always trim away a little extra felt to clean it up. Remember : "rustic"=good when it comes to treasure maps.

Once all of the pieces are stuck on the way you want them, sew on the very easy running stitch trail!

Now is the time to add any other embellishments you would like. I thought it needed some waves to fill in that empty space.

Now take your second piece of fabric, and pin it to your completed map piece, right sides out. Sew a random jagged edge to attach the two pieces.
A better view of the wonky edge.

Then cut around the edge, about 1/4 inch form the stitch line.

Now, to make it look really authentic, use a seam ripper to tear up the edges, being careful not to actually rip the seam!

All done! I think he likes it!
I hope I did alright for my first time. I definitely have some more fun things to come!
---CJ
Pin It
Beautiful job!
ReplyDelete:)
DeleteI love this idea so much and I know my boys will too!
ReplyDeleteI featured on my SewBoy features:
http://seemesew.blogspot.com/2015/08/sewboy-features-for-august.html