Showing posts with label tutorial. Show all posts

Friday, January 11, 2013

My First Knitting Pattern*

Last year I learned to knit. It was something that I always thought was way too intricate for me to ever really do, let alone excel at. I stepped my game up this year, mostly because I have more than enough garter stitch scarves, and I want some diversity in my overflowing closet of scarves scarf collection. After dozens of...cast on, knit a few rows, stare perplexedly at the pattern, stretch it out, wrinkle my nose, and unravels... I came up with this pattern*


*as a novice knitter, and a horrible follower of directions (ask my husband about that one) I will try my hardest to put this in "normal" knitting pattern lingo. If you're like me and "co 56, k4, p1 blah blah blah doesn't paint a good enough picture for you, I will also write it in a way that makes sense to me. 
Sorry about the grainy pics! It's winter time, thus, very dark in the mornings still. 

I used one (120m) skein of Bravo Big, which is a bulky yarn. (Similar to Lion Brand Hometown USA, but a much bigger skein. You could substitute 2 skeins of Hometown for this.) Sorry I don't have more information, I threw out the label a while ago/most of it was in German anyway. 

Knit using size 15 circular needles 

cast on 56 stitches and join the ends together, making sure the stitches aren't twisted.  
Knit four stitches (counting the join as the first knit stitch) then purl one stitch. keep doing this until you are almost out of yarn, then cast off loosely & weave in ends.

in Knitter lingo I think that would be:
CO 56, join ends *K4, P1* until you are almost out of yarn, cast off loosely & weave in ends.


It is reversible, and looks cool both ways.  


I prefer the Purl side though. 


On a side note, my big accomplishment of the week: Re-covering my ironing board. It got some much needed new padding (by way of a sacrificed old towel) and a cover that hurts my eyes much less than the pink swan number it was sporting previously. I'm proud of this because I love ironing. L O V E it. I'm not kidding. 


Special thanks to Liz Miller for the yarn! :) 

Pin It

Wednesday, October 3, 2012

Felt Bow Tie Pasta

My child finds mysterious ways to inspire me. Example: One of my friends needed their daughter's Halloween costume shortened, in the midst of measuring and pinning and whatnot, she left her plastic pearl necklace here. Dom found it, and has been trying to feed it to me as Spaghetti for the past few days. 

So I was thinking
I need to make more stuff with many small parts so I can go crazy trying to round them all up constantly! This kid needs play pasta! 

It's an easy one, trust me. It's exactly like making real pasta shapes, except felt is less floppy and tear-able...So it's way less frustrating.  

You will need:
1 sheet of felt (mine's antique white)
Floss or thread to match
Pinking shears (zig zag edge scissors)

First, cut 2" wide strips with pinking shears. 

Cut the strips into 2x2" squares with regular straight scissors. 

Take one square and accordion fold it, so it looks like a "W" ... or "M" depending on where you're standing.   

If you get confused, you can just check out a piece of bow tie pasta, but here's what you should be looking at. 

Thread up your needle with 1/2 thickness of the floss (3 strands) Start in the middle crease...

... thread to the outside, then back all the way through to the other side...

...and through to the middle again. 

Like this. 

Knot the two ends together, pull tight and double knot. 


Taadaa!


One sheet of felt will make 20 pieces. Which is the perfect amount for a bowl of pasta. 

--CJ


Pin It

Monday, October 1, 2012

The [Won't Fall on the Ground and Get Run Over] Stroller Blanket

I can't believe it's October already! The leaves are changing, it's starting to get cold, and today, it looks very gray and wintery. *sigh* 

On a happy note, the other day my friend/next door neighbor hooked me up with a bunch of fabric. Amongst which was this super-adorable monster print. I was instantly in love! I needed to make it into something that would get a lot of use, so I can see it all the time and be happy. It was a whole yard (which I don't usually get because fabric is pricey over here) so I could make a blanket for Dom! 

I'm pretty sure anyone who has a kid has put them in a stroller in the winter, and threw a blanket on them, because I know I would love to be chaffered around while bundled in a blanket. Then as you're trekking through the snow, suddenly your child gets claustrophobic, and Incredible Hulks their way out of their cozy bundle. Leaving your Brookstone Nap blanket mangled, wet and dirty wrapped in the tires of your stroller. Yes? 

NO MORE! 

Introducing The [Won't Fall on the ground and Get Run Over] Stroller Blanket! 
It's a simple square blanket with straps, super easy.
You need:
1 yard cotton fabric
1 yard Fleece/minky/flannel 
1 hair elastic
2 buttons
sewing machine

First things first, wash and dry your fabric. 
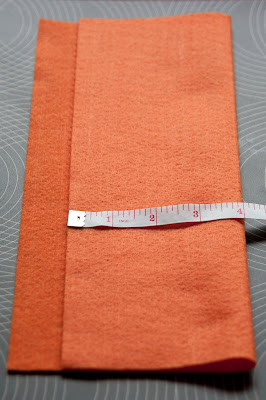
Press and cut the cotton fabric into a 36x36" square. 
You will have a strip left over.

Cut that strip to about 15" long (the one pictured was shorter, but if I were to do it again, longer would be better) then cut the strip in half lengthwise. 

Fold and press your two pieces in half, and stitch along the long open end. 

Press open the seams, turn them right side out, re-press, and tuck the open ends into the tube. 

Cut the metal piece off of your hair elastic, and cut the remaining piece in half. You can melt the ends with a lighter to keep them from fraying. 


Insert the elastic loops into one end of each strap. Pin in place and sew. I ended up hand sewing this part because my machine did not like going over the elastic. 

Now take your nicely cut 36x36" square of cotton fabric, and line up its selvedge edge with the selvedge edge of the fleece (minky/ flannel/ whatever you use). I do this because it is the factory straight edge. The cuts they make at the craft store are rarely ever straight.  

 See:
Use the cotton as a stencil, and cut the fleece to match it. 

Sandwich your strap pieces (elastic end inward) between the fleece and cotton (which are right side together) eight inches from the outside edge, one on each side. Pin all the way around the  blanket, and stitch, using a 1/2" allowance. Leave a 5-6 inch opening to turn the blanket right side out. 

This is what you will get! Hand sew the turning hole shut. 

Press it nice and flat (on the cotton side, fleece and minky don't like to be ironed) re-pin around the edge, and top stitch. 
I used about a 3/4" allowance. 

Sew a button to the base of each strap. You will use the strap to attach the blanket to your stroller frame so it can't get thrown off. 

If you fold the blanket in thirds, and roll it up, the straps can also be used to tie the roll together for tidy storage. 

I had to bribe him with fruit snacks to model this thing for me. Crazy kid. 

It's wide enough that it can be tucked in around his body, and there's enough room at the top that he doesn't feel like he's in a straight jacket. 

And it's just short enough that it won't hang all over his wet boots! 


--CJ 

Pin It

Wednesday, September 26, 2012

Super Easy Leg Warmers

 I dug one of my favorite old sweaters out of the basement the other day... 
I put it on and realized that it has totally lost its appeal. The poor thing is just stretched out, pilling, scratchy, and out of style. I wouldn't even bother sending it to the thrift store. It's perfect for chopping up though! I would feel weird about cutting up a perfectly good sweater for leg warmers, but this things really has outlived its goodness. So, away we go! 


This is possibly the easiest thing ever. Plus, I needed a pair since my only favorite black leggings are capri length, and I hate hate hate wearing socks.


Turn sweater inside out. 
Cut off sleeves.
Cut sleeves so they are even. 

Fold the edge under, pin and sew. 

You're done! 

Now my legs are warm! Mission accomplished! 


On a side note, my MOPS craft debut went pretty well! 

 Here are some of my favorite ladies working on their bows :) I'm excited to do some more craft work with the group, and hopefully teach them some new tricks! 


--CJ 


Pin It

Monday, September 24, 2012

Baby Felt Pumpkin

A lot happened over the weekend! Well, A lot for me anyhow. 

Friday morning, bright and early, my husband participated in the Army Substance Abuse Program (ASAP) Honey Badger Challenge. 

Educate yourself about the honey badger:
*WARNING STRONG LANGUAGE* 
(in case you're offended by stuff like that) 


So he ran this cool obstacle course, annddd I didn't get any great pictures because trying to keep a 3 year old in tow with a bunch of slip&slides that he isn't allowed to play on all around... was... tough. A challenge unto me as well. 

After that, errands were ran, and we got back home in time to jump on a bus to go paint ceramics. Dom made a messy coaster that I somehow managed to keep him from making into a splotchy brown mess. I'm excited to see how it comes out. 

AFTER THAT, we went to the fall carnival at the local elementary school. Where I spent the entire time on various lines to purchase food. 

Long bus ride home, night night. 

Saturday I spent the whole day with a headache, cleaned the house, and was gifted some super-awesome fabric from my neighbor! 

Sunday: Football. So, up until about 3AM. 

Woke up this morning at 9. 

Am I tired? Sure, but I feel like I haven't done anything over the past few days... craft-related. So I think I might go on a crafty tear today. 

My neighbor has the most incredible decorations for Halloween that I have ever seen. I have...nothing. : / So I HAD TO make something to bring the festiveness to our place. Pumpkins are the easy answer. What's better than regular pumpkins? Cute teensie tiny baby pumpkins, of course! Pumpkins made of felt, that will never rot into a stinky puddle of mush on your doorstep! Ew, right?!  
Awwwwwwww.

You will need:

A sheet of felt (to make 4 pumpkins,  an 8x3 piece if you want to make one) 
Embroidery floss (a piece at least 18" long per pumpkin)
Poly Fill
Glue
A stick (or other stem-like device)

Fold your felt piece (along the long edge) so that the folded portion measures 4". Trim off the excess, and sew along the open edge. I used the sewing machine for this. Measure and mark four, three inch sections on your felt tube. Cut along the lines. 

Take one of the pieces, and turn it right side out.

Starting at the seam edge, running stitch all the way around the circle. Use small, even stitches. 

Pull the thread tight, like a drawstring, and knot off the end. Without cutting your thread, pull the needle through the center hole of your gathers. 

On the second side, running stitch the edge like the first side, but make alternating long-short-long stitches. 

You can see a little better what I mean here. Once you get all the way around, fill with poly fill, pull it tight, and knot.

Still without cutting the thread, start making loops from the top hole to the bottom hole. These will be the creases in the pumpkin. 

Go all the way around. The number of loops you will make depends on how many large stitches you made while gathering the top portion. mine had eight. Once you make all of your creases, knot off the end. 

You will have to fluff and shape it up a bit. I use my needle to pull out the dents in the top so they look smooth. 

For the stem, snap off a 1-1.5 inch piece of twig, luckily I had one lying around the house that Dom dragged in the other day, put a drop of glue in the top hole...

...and stick and twist your stem stick on in there. 

All done! Aren't they cute? I think they would make great place card holders for Thanksgiving dinner or a fall wedding! 

--CJ 


Pin It