
This morning I made one of those "for a very specific purpose" crafts. My "purse" is just a big open tote bag with a bunch of smaller bags floating around inside.

A: Pull-Ups and wipes
B: iPod
C: Thrift store funds
D: First aid
E: Wallet
F: Ladies necessities
G: Spare shopping bag
H: phone
Along with these bags is a folder with VAT forms, an umbrella, keys, and about half a dozen random toys. I decided it was time for the toys to get a home of their own. Behold:

Things You will need:

Two pieces of fabric at least 12"x12"
some ribbon/string/shoelace/drawstring like device
Optional: springy toggle doo-dad


I found the biggest circle stencil in my possession, which happens to be a dinner plate, and traced it on my fabric pieces. I wished my circle was a bit bigger, so when I cut the pieces out, I left a bit more room around the edges.

Next I marked where I wanted the hole for the drawstring to be. (about 3/4" from the outside edge.)

Button holes were another thing that I was deathly and needlessly afraid of, but they're easy! A lot of machines nowadays have fancy features that pretty much do everything for you. Mine doesn't, but honestly, I kind of like having a little more control over the whole process. Different fabrics move through the machine differently, so I always do a test button hole on a scrap of the fabric I'm using before I stitch on my real piece.

Sometimes the left and right sides of the button hole get stitched tighter or looser, so you may have to adjust this guy (the zig-zaggy plus and minus thing) to get them to match up. Read your manual though, you'll probably learn a bunch of cool things your machine is capable of that you had no idea about!

Ok, once you're happy with your test hole, go ahead and stitch one onto your outer fabric piece. Use some small scissors or a seam ripper (carefully) to open up the hole.

Taadaa!

Now pin the your outer and lining pieces together right sides facing in, and stitch around the edge using a 1/4" allowance. Don't forget to leave on opening to turn everything right side out! OK?

So now we're turned out and pressed neatly. Time to make a drawstring casing. I used a ruler and chalk to give me a stitching guide. Stitch along your line (or if you don't need a line, about 3/4" from the outer edge) and then topstitch your outer edge (at about 1/8")


Once everything is stitched up, use a safety pin to thread your drawstring material of choice through the casing.
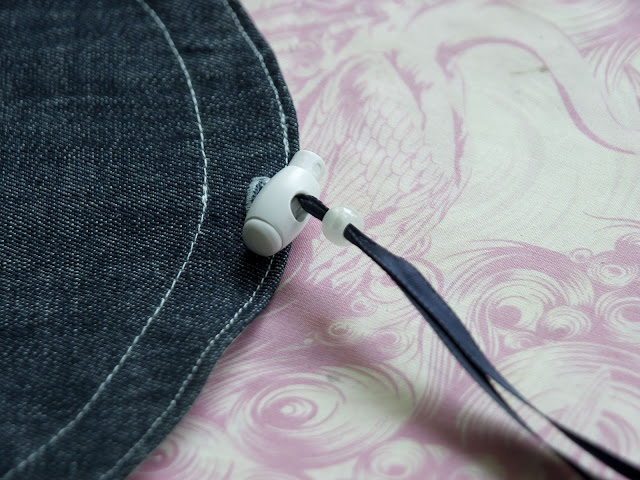
 Now you can attach your springy-toggle thing if you have one, or just knot your string if you don't.
 I originally wanted this to be a lot larger than this, BUT then I remembered that I'm going to be toting this thing around in my purse. It holds seven cars, which is more than enough! The best part is that if you cinch the draw string just a little it turns into a bowl, so Dom can play with all of his cars on the bus without them falling all over the place! We got to test it out this afternoon, and it worked great! Yay for not chasing Hot Wheels all over the bus :)
--CJ


--CJ
Pin It
No comments:
Post a Comment