I had another busy week. I'm starting to think that it's just how my life is going to be now, and I should just stop carrying on about it. So, for the last time, this week went by really really fast!
As for my weekly picture, I was going by 7 day weeks, starting on the first, but most of the time I have no idea what day it is. I'm going to need to just make fridays my deadline from now on. To make up for the 3rd week of January:
It's not the best quality picture (Instagram) but it's certainly the coolest subject of the week. Also, I'm pretty sure it's the only picture I took, so It will have to do.
Today, being the 4th friday of the month:
This is another scarf that I'm almost done with. Yes, another in a week. Don't judge me, it's cold over here.
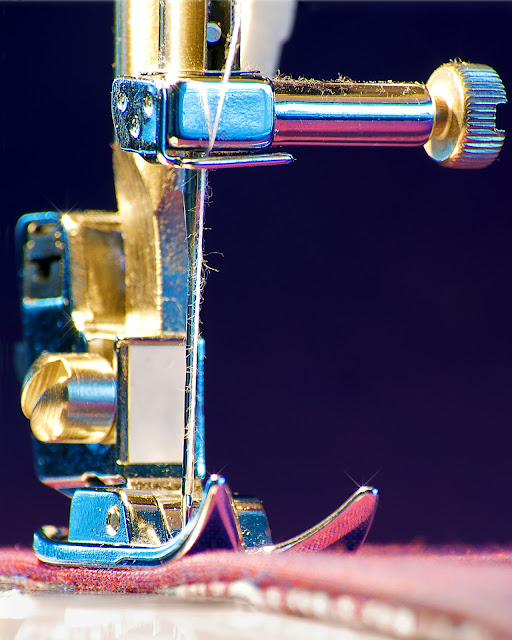
I also found out last night that I won second place for Still Life in the MWR All Army Digital Photo Contest. I was the only civilian from our area to place in the worldwide level. So, I'm extremely proud of myself!
Here's the winning picture: My Machine
OK! Now, as promised, A tutorial!
Why "Don't Mention It?" Because I made this specifically to hold my ... um... lady's unmentionables. They previously floated around in my make-up bag, and after reaching for lip gloss and spilling tampons all over the place, I decided they needed a home of their own.

Make sure to cut the pattern so that it is right side up when the curved side is facing down.
You will need:
sew on snaps
An exterior fabric
lining fabric
and fusible interfacing
Each slightly smaller than an 8.5x11 sheet of paper
(1/4 yard of each will be more than enough)
and a third (optional) coordinating fabric for tabs.
1 scrap approx. 3.5x3.5"
and
1 scrap approx. 6x2"
TABS:
Take your rectangular piece, and fold it about 1/4" down along the long side and press.
Take both rectangular and square pieces and fold them in half, Press and unfold.
Fold the outer edges in to meet at the center crease, press.
Then fold in half so that the raw edges are hidden on the inside.
In a coordinating thread, stitch around the edges of each tab, close to the edge (1/8") then again at 1/4" from the edge.
Affix fusible interfacing to the wrong side of the exterior fabric. Fold the bottom (straight) edge as if you were folding the envelope in thirds. (you can fold it to any height you would like, depending on how long you would like the flap to be. If you want a shorter flap, bring the bottom edge up higher)
Fold the rectangular tab in half, and sandwich it between the two layers of the exterior fabric. The raw edges should be along the open edge of the envelope.
Center the square tab on the flap, cut to desired length, and attach it to the exterior piece by stitching close to the edge.
Stitch the sides with 1/4" allowance.
Repeat with lining fabric.
Fold the bottom corners in 3/4" on each side. Pin, and Stitch across the bottom at 1/8"
Repeat with lining fabric.
Turn the exterior piece right side out, and put it inside of the lining piece. Fabrics should be right sides together.
Line up the side seams first and pin. Then pin around the rest of the envelope.
Stitch around the edges with 1/4" allowance.
Start on the straight pocket edge, stitch for a couple inches, backstitch, stitch for a couple more inches, backstitch again, then continue around the rest of the envelope. This will give you a place to open the seam to turn the piece right side out.(pictured further down)
Notch the curved edges of the flap.
And the right angles where the flap meets the pocket. Be VERY careful to not clip the stitches.
Here is where I backstitched to make my opening.
Rip the stitches between the backstitched areas.
Then turn the envelope through this opening.
Press, and pin the lining in place. Hand stitch the opening you used to turn. Then topstitch around the edges.
I used sew on snaps to keep it closed. (not pictured) But you just sew one side of your snap to the flap above the tab, then close the flap to measure where you should place the second side of the snap. (measure with the envelope full, so you leave enough room for the snap to close.)
This envelope came out sightly smaller than my first, because it went from doodled pattern...
My original pattern that had gotten
abused a few times before I scanned
it and turned it into PDF form.
...To computer pattern, BUT I made necessary changes to the pattern to make it the correct size before I uploaded it :) .


No comments:
Post a Comment