Wednesday, September 12, 2012

Awkward Pants Deserve A Second Chance

I got these pants at the $5 bag sale. I tried them on, and they looked ok! I figured I'd shorten them up and we'd be good to go. Well, I got them home, put them back on, and turned around in front of the mirror...


Hold the phone... That is some really gross bunchy butt action going on. Fixing pants is still kind of uncharted territory for me, and taking them in from the sides wasn't going to cut it this time. I threw them in my pile, disgusted, and figured I'd re-donate them to the Thrift store. 

Well, I got the up courage today to take another stab at fixing these things. I really would like a relaxed pair of kaki pants, and what was the worst that could happen? 

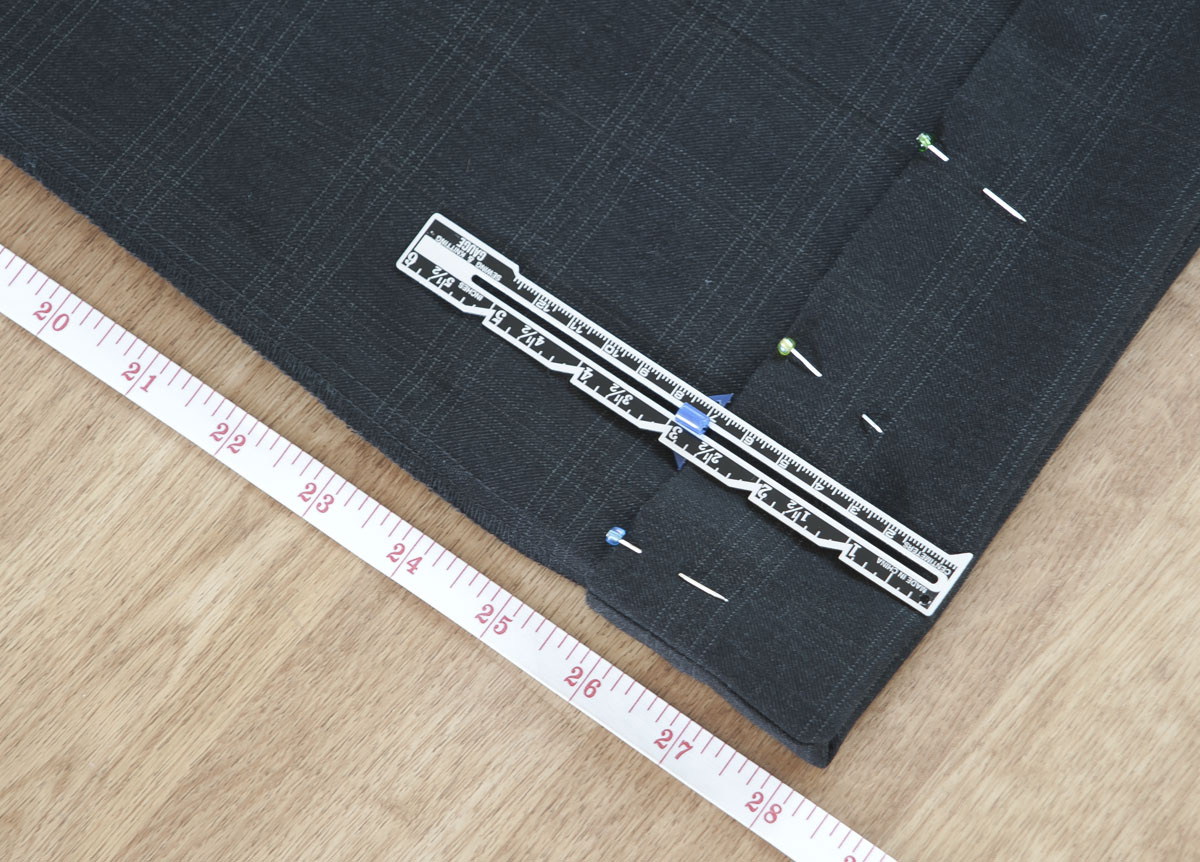
I tried something that I was really unsure of, I pinned up the butt seam all the way from the waistband to the bottom of the zipper. Then I took it in about an inch at the widest part, tapering in at the ends (the waistband and the zipper). I also removed the back pockets, that weren't really pockets anyway, they just added even more butt bulk, so they had to go. 

Here's another view of the butt seam, it's a weird seam to re-sew, so be very careful that both layers are going through the machine and not bunching up. 

After my bum was re-done, I decided to take a little bit in on the inner thighs. Lay everything really flat, and stitch in STRAIGHT lines. A curved line makes weird blobs on your legs. Believe me, I had to re-sew a few times to make sure everything was super straight. I also sewed shut, and snipped off the front pockets. 

Then after the obligatory shortening by about half a foot, they're done! 

...And check that out! Major improvement! 

With it feeling awfully Autumn-y today, I'm excited to have a "new" pair of pants! 


--CJ 

Pin It

Tuesday, September 11, 2012

Just Another DIY T-Shirt Makeover

This past weekend marked the beginning of football season. Football is, by far, my favorite sport (to watch. I don't play sports. I'm small, weak, and I have bad joints.) Anyhow, I love it so so much that I am in two fantasy football leagues, I have a closet full of jerseys, and I stay up to the wee small hours in the morning to watch it live. Yes, football starts at 7PM here. The Sunday night game ends around 5AM. I don't usually stay up for the "night" game, but this time, the coffee I drank to keep me up till 2AM did just that.... then woke me back up at 3:30.... I managed to get back to sleep at 6:45. Dom woke up at 9. 

Yesterday I was a zombie. 

Today is a new day, and I have a date with the craft store. The fun thing about having an unruly heap of thrift store clothes waiting to be revived, is I can wear something new pretty often! I just have to earn it!
What other way to get back into the swing of things than a good 'ol t-shirt makeover?! I LOVE this shirt! It appears that whoever had it before me did not love it, because it looks like it's never been worn! Yay! Now to make it fit!

I took it in 2 1/2" from the sleeves to about half way down the body, then tapered it out a little towards the bottom. 

This shirt was too long, but I didn't want to loose the stripey bottom. So I stitched two straight lines down the sides at the bottom. These are going to be a tie casing. 

I threaded some ribbon onto a needle with a big eye...

And threaded it through my casing.

Once you get to the top of the casing, pull the needle through the side seam. I needed to use pliers to pull the needle through, it was a tight squeeze. 

Now cut the ribbon of of the needle, and tie a knot. 

Now you can gather up the extra length and tie a bow...

...Or just sew the ribbon in place and cut off the excess. 

Now I have a cool new comfy tee!

Off to the craft store I go! 

---CJ 

Pin It

Friday, September 7, 2012

Awkward People Deserve Pants Too

It's true... We do. If it isn't obvious in previous pictures of me, I'm really short. Like under 5' tall. I also have a small waist, wide child-birthing hips, and...how do they say... junk in the trunk. I know I know, I shouldn't be complaining, but pants have been a sore spot in my life. 

These are New York & Co. stretch trousers, and they're too big... in places. 
Here's my Subway commercial pose. If I learned only on thing from What Not To Wear, it's find things that fit your biggest part, then tailor the rest to fit the smaller parts. Because looking like a sausage is not ok. 

These fit my bum and hips. Now for the make smaller part. 

Put your pants on inside out. Pinch and pin until you get your shape just right. You will soon understand why "safety" pins are called that if you decide to do this with straight pins. 

All pinned up!

Once you take your pants off, carefully measure how much you're taking in on each side, making sure it's the same on both sides. Pin and sew!


I got lucky, and they fit just right on my first try. So I cut off the excess, and stitched a zig-zag over the open edges. 

Now for the hem, which is something I've been doing forEVER. Measure the inseam of a pair of pants that are already the right length on you, OR measure from your crotch to the floor and deduct about 1/2". With your pants inside-out fold up the cuff until the bottom edge is your desired length. Pin, press, and try them on. You will probably need to adjust the length one way or another. I ended up going about 2 whole inches shorter than this, I swear I thought I had a 28" inseam. Maybe I'm shrinking, or my brain is failing me... or both. 

You can hem these by hand so there is no visible seam, but I'm lazy I don't mind how the seam looks. 

Taa Daa! No clingy-booty-sausage-thigh!

Now, I've never owned "trousers" before. They always seemed like stuffy office wear to me. Turns out, they are just a fancy looking pair of pajama pants. These things are comfy! I'm so happy to have something other than jeans in my pants repertoire! 

BTW: 19¢ from the bag sale ;) 

--CJ


Pin It

Thursday, September 6, 2012

A Place For My Mug

For a while I've been jonesing for a "Mug Rug." They're like little tiny quilts, and they are ADORABLE! I am not coordinated or patient enough to make a normal grown-up sized quilt...so micro-quilt was out of the question.  After accepting mug rug defeat, I decided to make a coaster of sorts. A coaster, ok... it's round, it's breakfast time, A DOUGHNUT! Of course! The best part is that if you don't need a place for your mug to hang out, this pattern can be made into a stuffed doughnut... because everyone needs one of those! 

Mmmm... Let's get started! You will need :

Felt in your cake color and your desired icing color. 
Coordinating embroidery floss (plus colors for sprinkles)
Fusible interfacing (optional)

Cut out your pattern pieces, and if you would like, apply fusible interfacing to the icing piece. It makes it hold up a little better when you embroider on it. Remember my Ironing Eco-Felt guidelines from my first post? If not, Here ya go! 

NOTE: I use Eco Felt, it is plastic, and it does melt! Be very careful when affixing the interfacing! 
•Use as low a heat setting as you can.
•Keep the iron moving.
•Steam seems to help things from getting sticky!

If it's the first time you're using this method, try it out on a scrap piece, so you can determine  good setting for your iron.  

Alright, now that it is fresh in your mind, we shall move along. 

Whenever I think of doughnuts the pink rainbow sprinkly ones come to mind. Perhaps it's my being raised in the Simpson's generation, but how can you argue that they're not the prettiest of all?! I picked 5 colors of embroidery floss (18" long each/ full thickness) and made a bunch of 1/8 to 1/4 inch stitches randomly all the way around the icing piece. 


Once you get your icing decorated as you wish, place it on top of ONE layer of the cake circles. For my coaster, I used a whipped running stitch for all of my joining stitches. For the stuffed doughnut I used a blanket stitch. The blanket stitch keeps the edges nice and secure (and flat) once it's stuffed. It takes a bit more time, but it's worth it. (Floss at half thickness [3 strands]) 

If you are ever in need of stitching inspiration, visit Sarah's Hand Embroidery. It is, hands down, the best resource for stitching instructions. 

Ok, here I have my outside stitched with a running stitch (the whipped part to come later.) Add the second cake piece to the bottom, and stitch around the hole. Make sure you catch all three layers as you make your way around. Then stitch around the outside edge of the doughnut. 

If you are making the stuffed version, I found it easier to sew about half way around the outside, add some stuffing, then stitch until it was almost closed, fill it the rest of the way, then close it off. 


There you have it. Doughnuts two ways! You can see how much of a difference stitch choice makes in a project! 


Now my mug has a happy place to sit :) 

--CJ 


Pin It

Wednesday, September 5, 2012

Crazy Shirt


Hi, remember this guy from the $5 bag sale yesterday?
How could you possibly forget?! It's bizarre! The situation didn't get any better when I put it on, either. 

Picasso-esque?

Hmm, this feels better...

Trace and pin and sew and......

CHOP!

Now, it's still a little bit funky. Which is good because a little is about all I can pull off. I bought one of those Victoria's Secret bras a couple years ago, ya know, the ones with the little Swarovski crystals on the strap (that cost a small fortune) I've never gotten to show them off until now :) 

I got this whole outfit for less than a buck! 57¢ to be exact. (except for the bra, of course...and the necklace) If this isn't enough to convince you to shop thriftily, I don't know what is! 

--CJ 


Pin It

Tuesday, September 4, 2012

Post-Vacation Slump

HI! Yes, I've been gone for four days. Want to know where I went?! 

Amsterdam!

Actually we had a stop in Nuremberg, for the Walk Off The Earth concert. If you haven't heard of them, check them out on YouTube... DO IT NOW! Don't worry, I'll still be here when you get back. 
Awesome right!? See the only child there? The one holding the purple balloon.. yeah, that's Dom! He had a blast! 


Anyhow, back in Amsterdam... we toured... we ate cheese and drank beers...  
...Tried desperately to not get run over by cars, bikes, streetcars, car cars, mopeds, street sweepers and other people trying to avoid getting hit by aforementioned vehicles. It was overstimulating, but that also means it was totally not boring!
Nighttime made the whole trip worthwhile for me. Aside from the people watching (you can guess why the people are interesting to watch here) the lights reflected on the canals were a beautiful and soothing contrast to this crazy, bustling city. 
Even the infamous Red Light District appears, dare I say... lovely? 
So after a few straight days of either sitting in the car or walking walking walking...I really considered sleeping half the day away today. 

Then I saw that our thrift shop was having a $5 bag sale! This time it's the thrift shop that is a 5 minute walk from my front door. It was a sign! I must get up to go to the sale! I was the first one there (DIBS!) and I scored some really awesome stuff. I'm super excited, and it was just what I needed to get me out of my post vacay slump. 

I will share with you my most intriguing piece:
Anyone care to explain this to me? I'm not going to lie, I spent about 20 minutes in front of the mirror trying to figure this thing out. I'm definitely not hip enough to wear it as-is... That and my right armpit is not in need of that much personal space. The knit is really soft and comfortable though, and it drapes really nicely, so it's most definitely worth the 19¢ it cost me! Now to do some slicing and dicing....

....more to come on this tomorrow! 

--CJ 


Pin It