Showing posts with label fashion. Show all posts

Friday, January 11, 2013

My First Knitting Pattern*

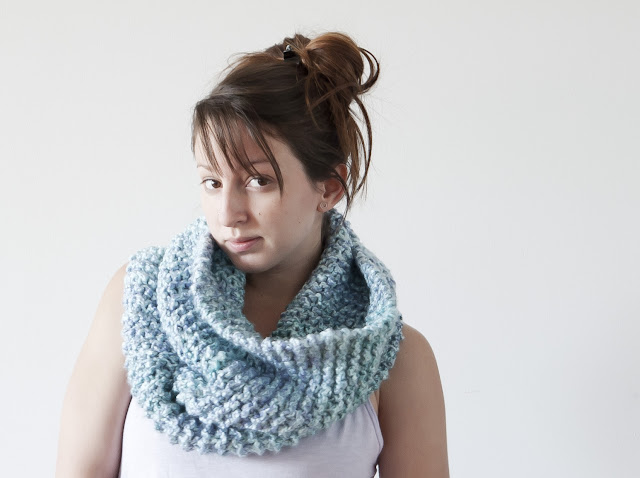
Last year I learned to knit. It was something that I always thought was way too intricate for me to ever really do, let alone excel at. I stepped my game up this year, mostly because I have more than enough garter stitch scarves, and I want some diversity in my overflowing closet of scarves scarf collection. After dozens of...cast on, knit a few rows, stare perplexedly at the pattern, stretch it out, wrinkle my nose, and unravels... I came up with this pattern*


*as a novice knitter, and a horrible follower of directions (ask my husband about that one) I will try my hardest to put this in "normal" knitting pattern lingo. If you're like me and "co 56, k4, p1 blah blah blah doesn't paint a good enough picture for you, I will also write it in a way that makes sense to me. 
Sorry about the grainy pics! It's winter time, thus, very dark in the mornings still. 

I used one (120m) skein of Bravo Big, which is a bulky yarn. (Similar to Lion Brand Hometown USA, but a much bigger skein. You could substitute 2 skeins of Hometown for this.) Sorry I don't have more information, I threw out the label a while ago/most of it was in German anyway. 

Knit using size 15 circular needles 

cast on 56 stitches and join the ends together, making sure the stitches aren't twisted.  
Knit four stitches (counting the join as the first knit stitch) then purl one stitch. keep doing this until you are almost out of yarn, then cast off loosely & weave in ends.

in Knitter lingo I think that would be:
CO 56, join ends *K4, P1* until you are almost out of yarn, cast off loosely & weave in ends.


It is reversible, and looks cool both ways.  


I prefer the Purl side though. 


On a side note, my big accomplishment of the week: Re-covering my ironing board. It got some much needed new padding (by way of a sacrificed old towel) and a cover that hurts my eyes much less than the pink swan number it was sporting previously. I'm proud of this because I love ironing. L O V E it. I'm not kidding. 


Special thanks to Liz Miller for the yarn! :) 

Pin It

Wednesday, September 26, 2012

Super Easy Leg Warmers

 I dug one of my favorite old sweaters out of the basement the other day... 
I put it on and realized that it has totally lost its appeal. The poor thing is just stretched out, pilling, scratchy, and out of style. I wouldn't even bother sending it to the thrift store. It's perfect for chopping up though! I would feel weird about cutting up a perfectly good sweater for leg warmers, but this things really has outlived its goodness. So, away we go! 


This is possibly the easiest thing ever. Plus, I needed a pair since my only favorite black leggings are capri length, and I hate hate hate wearing socks.


Turn sweater inside out. 
Cut off sleeves.
Cut sleeves so they are even. 

Fold the edge under, pin and sew. 

You're done! 

Now my legs are warm! Mission accomplished! 


On a side note, my MOPS craft debut went pretty well! 

 Here are some of my favorite ladies working on their bows :) I'm excited to do some more craft work with the group, and hopefully teach them some new tricks! 


--CJ 


Pin It

Thursday, September 20, 2012

My Toasty New HIdeout

Due to recent unforeseen busyness, I haven't accomplished much in the world of craftyness. By not much, I mean I only made this scarf in the past 2 days. My sewing machine is feeling slighted, and I have a felt pile that is calling my name. Sigh . On a very happy note, my scarf is fabulous. It's soft and pretty, and I can pull it up over my head in case I have the sudden need to hide from a predator or play a quick game of peek-a-boo. 
So a BIG thanks to my super awesome Grandma, for hooking me up with fancy yarn and hours of entertainment! :) I still have more left over! So there may be scarfs in the works for a couple little girls I know! 

....  yayyyy for friends with daughters! ....


--CJ 

Pin It

Monday, September 17, 2012

Scarf Weather

In my pre-blog days (a few weeks ago) I didn't accessorize much. On a good day I would wear shoes that matched my "outfit." It's just that accessories aren't cheap. You see, I have the problem that a lot of mothers have where, for about the first 3 years of your child's life, you feel super-guilty doing anything except bending over backwards for them. Every time I have a want, I think about how the money could be better spent on Dom. 

Then I realized that he had a much nicer wardrobe than me . 

I'm slowly getting over it.  I'm proud to say that I've bought a few pairs of jeans recently to replace the one's I've been wearing since high school. 

But accessories are still too expensive to me. I don't like spending more on the little details of an outfit than the major components! It's nuts! Scarfs are super trendy now, I like them, and they're easy and CHEAP to make! Double win!

We all have tops that are clinging around our drawers (or hanging out at the thrift store) that we love, but refuse to get rid of. They don't fit, and they're never going to fit... but but but..... 
Hi, I'm too short. 

Too revealing. 

Too much... stuff. 

The process is pretty much the same for all of these:

Chop the top. For the jersey knit tops, this is all you have to do. Since this one is cotton, there's an extra step. 

Rake your nail along the edge, to give it that frayed-fringy look. 

Taa-daa!

If you shirt isn't wide enough to wrap around your neck twice, it helps to make it look fuller by sewing it into a trapezoid shape. Like so:


My dotted line is just accentuating my trapezoid, you would only sew the sides, not the top and bottom. 


Three new scarfs for under a dollar! I can live with that :) 

---CJ 


Pin It

Friday, September 14, 2012

Cardigan Rejuvenation

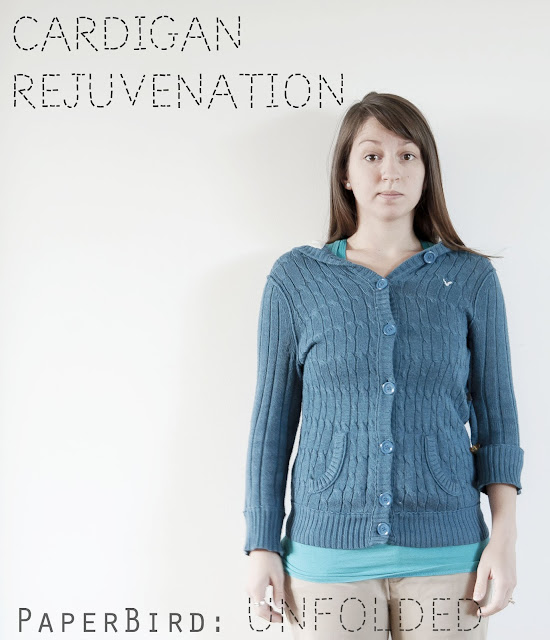
As I mentioned yesterday, it's just about sweater season here in Germany.  This morning I pulled out my only favorite cardigan. I've had it for years. I wore it a lot during the brisk Florida "winters." Sadly, the years have not been kind to my dear cardigan. It's stretched out in weird ways, and either the sleeves shrunk or my arms got longer. 

It needs some love. You can see on the left side (my right) how saggy the shoulder has gotten from hanging on a hanger for many years, thus making the sleeve a weird length for me. It looks ok when my arms are down, but in any other position, it's in this mid-forearm-wrist area...anyway they look to short. Also, I have to point out  the very unattractive armpit crease thing going on. 

On the right side I folded up the cuff to where I think it would look good, and clipped the width of the sleeve as well. I like to give myself a visual before I get to sewing, and safety pinning with one hand is not fun. 

These guys work great. Did you ever notice on Say Yes To The Dress, when the dressed are too big, they don't pin them, they clamp them! It works! 

First, I will shorten the sleeves. With the cardi right side out, fold the cuffs up as far as you want them shortened (everything to the outside of the original cuff will be cut off, and the original cuff will stay intact) Stitch around the sleeve, over the existing cuff seam. 

After I cut off the excess from the cuffs, I turned the Cardigan inside out, then measured and pinned how much I wanted to take the sleeves in. 

I stitched them up and chopped the excess. 

Now my good 'ol cardigan looks cute and fitted, rather than baggy and sloppy!

I'm so happy I was able to extend the life of this piece! 

--CJ 


Pin It

Wednesday, September 12, 2012

Awkward Pants Deserve A Second Chance

I got these pants at the $5 bag sale. I tried them on, and they looked ok! I figured I'd shorten them up and we'd be good to go. Well, I got them home, put them back on, and turned around in front of the mirror...


Hold the phone... That is some really gross bunchy butt action going on. Fixing pants is still kind of uncharted territory for me, and taking them in from the sides wasn't going to cut it this time. I threw them in my pile, disgusted, and figured I'd re-donate them to the Thrift store. 

Well, I got the up courage today to take another stab at fixing these things. I really would like a relaxed pair of kaki pants, and what was the worst that could happen? 

I tried something that I was really unsure of, I pinned up the butt seam all the way from the waistband to the bottom of the zipper. Then I took it in about an inch at the widest part, tapering in at the ends (the waistband and the zipper). I also removed the back pockets, that weren't really pockets anyway, they just added even more butt bulk, so they had to go. 

Here's another view of the butt seam, it's a weird seam to re-sew, so be very careful that both layers are going through the machine and not bunching up. 

After my bum was re-done, I decided to take a little bit in on the inner thighs. Lay everything really flat, and stitch in STRAIGHT lines. A curved line makes weird blobs on your legs. Believe me, I had to re-sew a few times to make sure everything was super straight. I also sewed shut, and snipped off the front pockets. 

Then after the obligatory shortening by about half a foot, they're done! 

...And check that out! Major improvement! 

With it feeling awfully Autumn-y today, I'm excited to have a "new" pair of pants! 


--CJ 

Pin It

Tuesday, September 11, 2012

Just Another DIY T-Shirt Makeover

This past weekend marked the beginning of football season. Football is, by far, my favorite sport (to watch. I don't play sports. I'm small, weak, and I have bad joints.) Anyhow, I love it so so much that I am in two fantasy football leagues, I have a closet full of jerseys, and I stay up to the wee small hours in the morning to watch it live. Yes, football starts at 7PM here. The Sunday night game ends around 5AM. I don't usually stay up for the "night" game, but this time, the coffee I drank to keep me up till 2AM did just that.... then woke me back up at 3:30.... I managed to get back to sleep at 6:45. Dom woke up at 9. 

Yesterday I was a zombie. 

Today is a new day, and I have a date with the craft store. The fun thing about having an unruly heap of thrift store clothes waiting to be revived, is I can wear something new pretty often! I just have to earn it!
What other way to get back into the swing of things than a good 'ol t-shirt makeover?! I LOVE this shirt! It appears that whoever had it before me did not love it, because it looks like it's never been worn! Yay! Now to make it fit!

I took it in 2 1/2" from the sleeves to about half way down the body, then tapered it out a little towards the bottom. 

This shirt was too long, but I didn't want to loose the stripey bottom. So I stitched two straight lines down the sides at the bottom. These are going to be a tie casing. 

I threaded some ribbon onto a needle with a big eye...

And threaded it through my casing.

Once you get to the top of the casing, pull the needle through the side seam. I needed to use pliers to pull the needle through, it was a tight squeeze. 

Now cut the ribbon of of the needle, and tie a knot. 

Now you can gather up the extra length and tie a bow...

...Or just sew the ribbon in place and cut off the excess. 

Now I have a cool new comfy tee!

Off to the craft store I go! 

---CJ 

Pin It