Friday, February 22, 2013

WIP

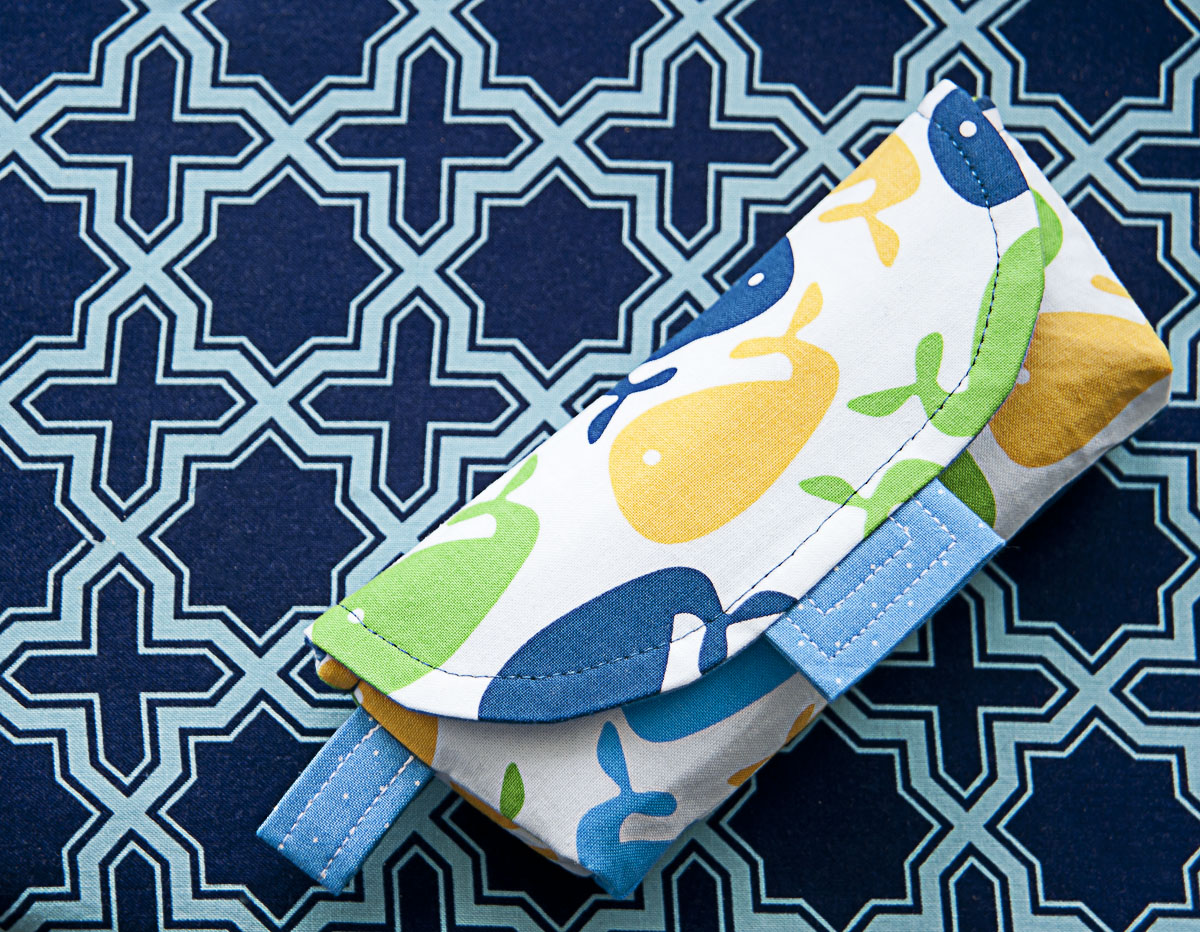
This is my work in progress. From the angle, it's hard to tell what it is, but I promise, it's going to be awesome. I had planned for it to be done so I could write up the tutorial today, but life-y things have happened, and I ran out of time. Tomorrow perhaps? I'm so very close to being done, it pains me.

As for week eight... Can you believe it's the 8th week of the year already?!  
I picked up some water marble vase filler things during my downtown outing on monday. I got them solely for the purpose of entertaining my child, and that they have. He loves them, he doesn't eat them, and he managed to not make a huge mess of them... until this morning. He took it upon himself to take the container down from the counter, and spilled them all over the kitchen. If you've ever played with these things, you understand that they are practically alive. the bounce and roll all over the place they're slippery, and if you aren't super gentle, they break. Sweeping 500 of these balls up was really...really... annoying. They are pretty though, so I can get past it. 

Ok, I'll be back soon with the outcome of my mysterious knitted rectangle. :) 


Pin It

Friday, February 15, 2013

Singularity

Yes, I am husbandless for a little over a month. He's enjoying above freezing weather with liquid precipitation, while we're hibernating and hiding from the abominable snowman here in Stuttgart. I'm super proud of myself for keeping it together for the past 6 days. Thanks to my child not being a total demon, and friends to keep me occupied, i've actually had a really nice week :) 

First things first, Weekly picture from last week:

This is what 6 yards of fabric will shed when you wash and dry it. Pretty, eh? 

Yes, I bought a ton of fabric last week at our local Craft Store's Super Bowl Sunday sale. So I took a break from knitting (ok I knitted one scarf) and made some cute stuff, as you shall see. 


Photo for this week:
This is from our Valentine's day shoot with Dominic and his "favorite girl" Bella. Anyone who has ever taken pictures of a three year old in a confined space will understand that taking pictures of two three year olds is just asking for trouble. I'm pretty sure that I blacked out at some point during the shoot. Thanks to Bella's mom (my favorite girl) directing, corralling and entertaining, we managed to get some really sweet pictures! 

Speaking of sweet, my husband buried Valentine's presents in his closet for us to find even though he's not here *cough* for the third year in a row! *cough* MMMmmmm... Wint o greeN! My favorite! 


As for cute stuff that I made.....
exhibit A: I made a library book tote for Dom's books (right) It happened to be waayyy too big for him. Well, He didn't seem to care that I was using it for myself for the past week until last night. "Dominic's bag is too BIG!" he said. How could I deny him a bag?! I made him a baby Dom-sized version, and he loves it! 


Exhibit B: We finished our jar of Nutella (which takes forever once you read the nutrition facts) and I admired how squat yet wide-mouthed the jar was. It's perfect for a tiny hand to hold! Guess who got a new snack jar?
Of course I couldn't leave it naked, so I made a velcro jar cozy. 
Ta daaaaaa!

Exhibit C: I've recently become a big fan of Invader, the artist. Not so much the arcade game... I'm not a gamer. Which, perhaps, makes me a bigger nerd. Anyway, I have been wanting something invader-ized for a while now, and I finally got around to it. Here's my new wallet! Cuteness!   

Here's to hoping for another happy week! 

Pin It

Tuesday, February 5, 2013

100 Stitches


I decided to do a science experiment today. Which mode of yarn weaving is most economical? I wrote single crochet off immediately, because crochet is known to take a lot of yardage. I always thought it was knitting in garter stitch. Probably because a scarf knitted in garter lays flat and is very stretchy. Surprisingly, after my tests, knitting in stockinette gives the best yarn yardage/swatch size ratio. 

Let's review my findings! 

My first test:
100 stitches

I used the same type of yarn (worsted), and knitting needles(6mm)/ crochet hook(I) that are about the same size. I didn't slip the first stitch on each row of knitting either. 

I cut the tails to 1", marked the working end, and unraveled. 

100 stitches of single crochet = 252" yarn 
2.52" used per stitch 

100 stitches of knitting (garter stitch=knit all rows)= 127.5" yarn
1.27" used per stitch

100 stitches of knitting (stockinette stitch=knit one row purl one row) =109"
1.09" used per stitch

Don't you love simple math?

But look! Although the crochet uses a ton more yarn, it makes a bigger swatch, that has to count for something! 

My second test:
4 feet

Admittedly, there probably was an easier way to do this one, but I didn't measure my first swatches before I unraveled them. I measured out 4' of yarn, and knitted/crocheted as much as I could with that amount. 

Crochet yielded a 1.75 sq in swatch
Garter stitch yielded a 1.5 sq in swatch
Stockinette yielded a 2 sq in swatch

So crochet isn't all that bad after all, and Stockinette goes way farther than I imagined. I'm not sure exactly what to make of this due to the uses/characteristics of each stitch making them the better choice for different applications, but it's interesting, nonetheless! 

Just thought I'd share how lame and nerdy I am 

Pin It

Friday, February 1, 2013

5 Odd Things

I think my knitting fever may be breaking. I finished another scarf a week ago, and haven't knitted since. I did go on a bit of a sewing tear, and i'm happy to report that the revised pattern I posted last week is a prefect match to the original! I know because I made a bunch of them. They're not just for icky women's things, you know. I now have one for sunglasses, and one for my wintergreen Lifesavers. They're a great size for a lot of odds and ends. I'm super satisfied with myself :) 

Photo: week 5 
My Yarn is lonely. 

I didn't do anything overwhelmingly exciting this week, so it's list time! 

5 Odd Things That I Actually Love About Living Here:

#1. Not being connected to the internet 24 hours a day. (No data plan. Yes, you can live without updating FB 67 times a day.) 

#2. Stores have crazy hours. Like they open late, close early, and have entire seasons off sometimes... and Sundays... nothing is open on Sunday. 
(I've become so accepting of the fact that things don't have to happen right this moment. If I need something, and it's after 6pm... it's just not happening until tomorrow.)

3#. Fast food is crazy expensive.
(After watching some American commercials this weekend over the internet, I would definitely weigh 400 lbs if I had access to that stuff on the cheap.)

#4. We don't get American commercials. 
(I sort of like not being marketed to all day long. When I do discover products, it's because I'm actively seeking something I need, not being told so.) 

#5. I don't understand what people are saying. 
(It's surprisingly relaxing to sit on the train and tune out everyone's German conversations. It's surprisingly stressful to sit on the duty bus with 25 American middle schoolers and listen to the awful awful things they talk about.)  

Yes, I'm aware that most of these were on my list of things that drive me crazy about a year ago. Funny how things change. 
Pin It

Friday, January 25, 2013

The Unmentionables

I had another busy week. I'm starting to think that it's just how my life is going to be now, and I should just stop carrying on about it. So, for the last time, this week went by really really fast! 

As for my weekly picture, I was going by 7 day weeks, starting on the first, but most of the time I have no idea what day it is. I'm going to need to just make fridays my deadline from now on. To make up for the 3rd week of January: 

It's not the best quality picture (Instagram) but it's certainly the coolest subject of the week. Also, I'm pretty sure it's the only picture I took, so It will have to do. 

Today, being the 4th friday of the month:
This is another scarf that I'm almost done with. Yes, another in a week. Don't judge me, it's cold over here. 

I also found out last night that I won second place for Still Life in the MWR All Army Digital Photo Contest. I was the only civilian from our area to place in the worldwide level. So, I'm extremely proud of myself! 
Here's the winning picture: My Machine 

OK! Now, as promised, A tutorial!  
Why "Don't Mention It?" Because I made this specifically to hold my ... um... lady's unmentionables. They previously floated around in my make-up bag, and after reaching for lip gloss and spilling tampons all over the place, I decided they needed a home of their own.  


Make sure to cut the pattern so that it is right side up when the curved side is facing down. 

You will need:
sew on snaps
An exterior fabric
lining fabric
and fusible interfacing 
Each slightly smaller than an 8.5x11 sheet of paper
(1/4 yard of each will be more than enough)
and a third (optional) coordinating fabric for tabs. 
1 scrap approx. 3.5x3.5" 
and 
1 scrap approx. 6x2"


TABS:
Take your rectangular piece, and fold it about 1/4" down along the long side and press.  
Take both rectangular and square pieces and fold them in half, Press and unfold. 
Fold the outer edges in to meet at the center crease, press. 
Then fold in half so that the raw edges are hidden on the inside. 

In a coordinating thread, stitch around the edges of each tab, close to the edge (1/8") then again at 1/4" from the edge. 

Affix fusible interfacing to the wrong side of the exterior fabric. Fold the bottom (straight) edge as if you were folding the envelope in thirds. (you can fold it to any height you would like, depending on how long you would like the flap to be. If you want a shorter flap, bring the bottom edge up higher) 
Fold the rectangular tab in half, and sandwich it between the two layers of the exterior fabric. The raw edges should be along the open edge of the envelope. 

Center the square tab on the flap, cut to desired length, and attach it to the exterior piece by stitching close to the edge. 

Stitch the sides with 1/4" allowance. 
Repeat with lining fabric. 

Fold the bottom corners in 3/4" on each side. Pin, and Stitch across the bottom at 1/8" 

Repeat with lining fabric. 
Turn the exterior piece right side out, and put it inside of the lining piece. Fabrics should be right sides together. 

Line up the side seams first and pin. Then pin around the rest of the envelope. 

Stitch around the edges with 1/4" allowance. 
Start on the straight pocket edge, stitch for a couple inches, backstitch, stitch for a couple more inches, backstitch again, then continue around the rest of the envelope. This will give you a place to open the seam to turn the piece right side out.(pictured further down) 

Notch the curved edges of the flap. 

And the right angles where the flap meets the pocket. Be VERY careful to not clip the stitches. 

Here is where I backstitched to make my opening. 

Rip the stitches between the backstitched areas. 

Then turn the envelope through this opening. 
Press, and pin the lining in place. Hand stitch the opening you used to turn. Then topstitch around the edges. 

I used sew on snaps to keep it closed. (not pictured) But you just sew one side of your snap to the flap above the tab, then close the flap to measure where you should place the second side of the snap. (measure with the envelope full, so you leave enough room for the snap to close.) 

This envelope came out sightly smaller than my first, because it went from doodled pattern... 
My original pattern that had gotten 
abused a few times before I scanned
 it and turned it into PDF form. 

...To computer pattern, BUT I made necessary changes to the pattern to make it the correct size before I uploaded it :) . 


Pin It

Friday, January 18, 2013

What A Week!

Here I go, already, almost messing up two of my goals for the year. One good photo for the week (eh, "good" is arguable) and writing a blog post once a week (how did Friday come so quickly?!)

Week 2 Photo of the week. Oh yes, i busted out the selective color.

Well, it started with maternity pictures for friends. We got some miraculous snow, and the pictures came out super cute. It's so easily said now, but my OCD/ADD lethal combination makes photo editing a drawn out process. I just finished this morning. 

Seriously though...So cute :) 


Just a few minutes after this shoot, I whipped up a double batch of hummus to bring to game night. Everyone agreed it was the best hummus ever. So I had every intention to post this recipe the following Monday. (didn't happen)  
Original recipe was clipped from a magazine, 
so if I had to guess I'd say credit goes to Family Circle. 


Sunday we sledded. 


Monday: Edited 


Tuesday: Coffee with friends/grocery shopping/ more editing


Wednesday: Editing/Afternoon of snow globe making/ bowling 
Oh, and I finished this scarf... 

Thursday: We had our first successful gathering of Sew Happy Together. The craft group we started months ago have just now gotten back into.


Thursday afternoon... I edited. 

That brings us to today. I finished editing yay! During the upload process (not enough bandwidth to upload and facebook at the same time, so I was completely un-distracted... is that a word?) 

I made this. Started from scratch, drew up my own pattern, put this together for the first time without swearing and ripping it apart.

I'm pretty sure it worked out that way because I wasn't stopping every 3 minutes to photograph and tutorial-ize this. I DO plan on making a second for that purpose though. Next week. I swear

Pin It

Friday, January 11, 2013

My First Knitting Pattern*

Last year I learned to knit. It was something that I always thought was way too intricate for me to ever really do, let alone excel at. I stepped my game up this year, mostly because I have more than enough garter stitch scarves, and I want some diversity in my overflowing closet of scarves scarf collection. After dozens of...cast on, knit a few rows, stare perplexedly at the pattern, stretch it out, wrinkle my nose, and unravels... I came up with this pattern*


*as a novice knitter, and a horrible follower of directions (ask my husband about that one) I will try my hardest to put this in "normal" knitting pattern lingo. If you're like me and "co 56, k4, p1 blah blah blah doesn't paint a good enough picture for you, I will also write it in a way that makes sense to me. 
Sorry about the grainy pics! It's winter time, thus, very dark in the mornings still. 

I used one (120m) skein of Bravo Big, which is a bulky yarn. (Similar to Lion Brand Hometown USA, but a much bigger skein. You could substitute 2 skeins of Hometown for this.) Sorry I don't have more information, I threw out the label a while ago/most of it was in German anyway. 

Knit using size 15 circular needles 

cast on 56 stitches and join the ends together, making sure the stitches aren't twisted.  
Knit four stitches (counting the join as the first knit stitch) then purl one stitch. keep doing this until you are almost out of yarn, then cast off loosely & weave in ends.

in Knitter lingo I think that would be:
CO 56, join ends *K4, P1* until you are almost out of yarn, cast off loosely & weave in ends.


It is reversible, and looks cool both ways.  


I prefer the Purl side though. 


On a side note, my big accomplishment of the week: Re-covering my ironing board. It got some much needed new padding (by way of a sacrificed old towel) and a cover that hurts my eyes much less than the pink swan number it was sporting previously. I'm proud of this because I love ironing. L O V E it. I'm not kidding. 


Special thanks to Liz Miller for the yarn! :) 

Pin It